Modify a template
View all Close all
Themes include colours, fonts, lines and fill effects. You can change the look and feel of your presentation with one click, quickly formatting all slides in one go, making them consistent.
- Click on the Design tab
- Select one of the themes in the Themes group or click on the More button and select a theme from the available list.
Note: You can choose to apply a theme to all or part of your presentation. Right click on the theme you want to use and then select an option from the shortcut menu, such as: Apply to All Slides, Apply to Selected Slides, Set as Default Theme.
The Theme Colours list represents the text and background colours on the slides. Theme colours contain two hyperlink colours, four text and background colours and six accent colours.
You can select a different built-in colour theme or create your own for your slides or for selected slides.
- Click on the Design tab.
- Click on the More button in the Variants group.
- Click on Colours, to see the list.
- Hover your mouse over the colour themes to see a preview on your slide.
- Click on a theme to add to your slides.
- Click on the Design tab.
- Click on the More button in the Variants group.
- Click on Colours, to see the list.
- Select Customise Colours. Select different colours for specific types of information and save the theme with a new name.
Font refers to the style, size and colour of the text in your presentation. Using two font types or different font size are good ways of providing a difference between titles and body text but, you can use one font type and show the difference by changing the font size. You can select a font set to apply to all or part of your presentation and can also create your own.
The best fonts to use: Times New Roman, Arial, Century Gothic and Calibri.
You can select a font set to apply to all or part of your presentation.
- Click on the Design tab.
- Click on the More button in the Variants group.
- Click on the Fonts.
- Hover your mouse over the font themes to see a preview on your slide.Click on a font theme to add to your slide.
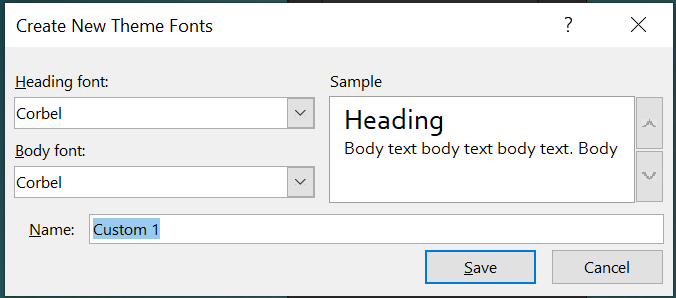
You can then specify the font to use for headings and the font to use for body text.
- Click on the Design tab.
- Click on the More button in the Variants group.
- Click on the Fonts.
- Click on a Customize font.
- Select fonts for the Headings and body text and save the Font with a new name.
When you change the theme background, styles are updated to reflect the new colours. You will have the options to add a Solid, Gradient, Picture, or Pattern fills. You can also remove background graphics for all or some of the slides.
- Click on the Design tab.
- Click on Format Background button.
- Choose a Fill from the list Solid, Gradient, Picture, or Pattern to apply to the presentation.
If you want to apply the background change to all the slides. click on Apply to All at the bottom of the pane.
If you want to turn off the background graphics for all the slides, place a tick in the Hide Background Graphics box.
In Slide Master view you can make changes to your whole presentation, such as adding logos or changing fonts. You can also customise the slide layouts or create your own.
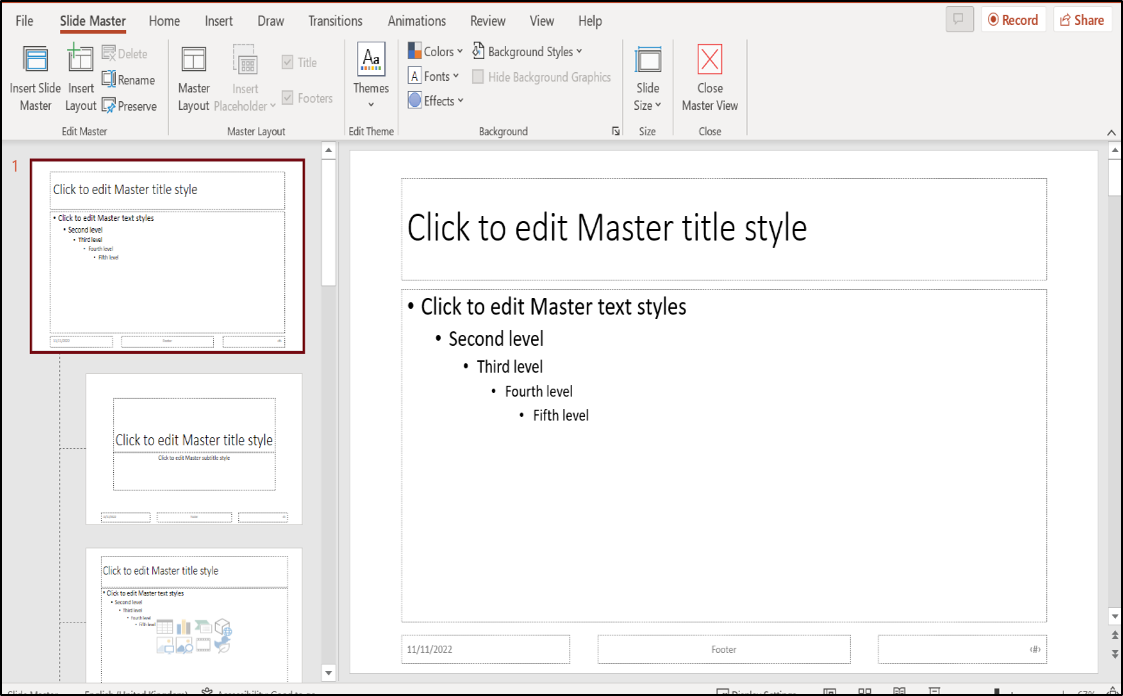
Viewing Slide Masters
To modify and work with the slide master, as well as each slide layout, you need to be in Slide Master View. The example above shows a new, blank presentation based on an existing theme in Slide Master View.
- Slide Master: Every template or theme, including a blank presentation (which has the Office theme applied by default) has a Slide Master. A Slide Master is the very first slide in the Slides pane and is slightly bigger than the slides below. You can use a Slide Master to make changes that you want applied to the whole presentation. Any changes you make to the Slide Master will be applied to all slides in a presentation.
- Layouts: Below the Slide Master in the Slides pane, are the available slide layouts for that theme or template. Depending on the sort of changes you make to these slide layouts, the changes may either affect the whole presentation or just that slide layout. For instance, if you apply Colours, Fonts or Effects, this formatting will be applied to the whole presentation. However, if you apply a Background Style the formatting will only be applied to that one slide layout. You can create your own custom slide layouts and you can then format the layout as you wish.
- Placeholders: The Slide Master, as well as each slide layout, contains a range of placeholders that hold text, such as the title, footer and the date, as well as objects, such as images, tables and charts. When you modify the title placeholder on the slide master, for example, the change will be applied to all slide layouts that contain a title placeholder. If the slide master does not contain a particular placeholder, such as a content placeholder (for images and the like), you will need to modify the content placeholder on the relevant slide layout.
- Click on the View tab.
- Click on Slide Master in the Master Views group.
- Click on the slide you want to edit.
- Go to Slide Master View.
- Click in either the title or text placeholder.
- Click on Fonts in the Background group and select a theme font.
- Go to Slide Master View, then click on the desired bullet level.
- Click on Bullets on the Home tab, then select Bullets and Numbering.
- Select the bullets you want to use.
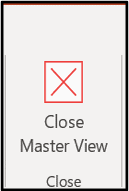
- Click on the Slide Master tab, then click on Close Master View.
- In Slide Master view, click on Insert Layout in the Edit Master group.
- Click on Insert Placeholder in the in the Master Layout group,
- Select the placeholder you want to use and draw on the slide.
After you add the placeholder, you may be taken to the Shape Format tab and will need to click the Slide Master tab to add more placeholders.
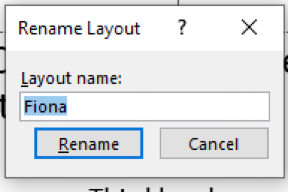
Click on the Slide Master tab, click on Rename in the Edit Master group, type a name, and click on Rename.