Format your presentation to make it accessible
View all Close all
Slide layouts include placeholders for the slide title, text, images, list, and tables.
They ensure the information on slides have the correct and logical reading order. For example, slide titles are presented as a heading to screen readers and are read for each slide - this makes it easier for users to read and navigate through the presentation.
Add a slide layout
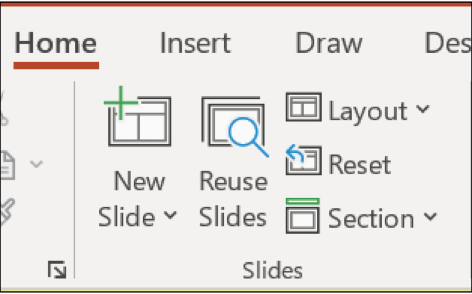
- On the Home tab, Click on the arrow next to the New Slide.
- Select a slide from the list.
- Enter your title and other content to the slide.
Change the layout of a slide
- Select the slide you want to change.
- On the Home tab, click on the arrow next to the Layout.
- Select a slide from the list.
The new applied layout will move the slide contents to the correct place in the new layout.
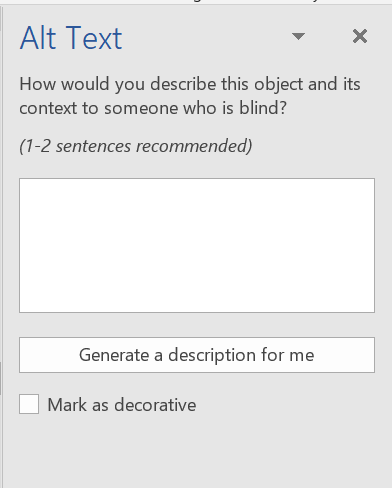
Objects should have a description that explains the purpose or the content of that object.
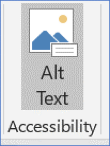
- Click on an object to select it.
- Click on the Picture Format tab.
- Click on Alt Text button.
- The Alt Text pane appears.
- In the Alt Text description box, type a brief description of the object.
- Click on the X, top right to close the pane.
Screen readers also use table header information to identify rows and columns and keep track of their location by counting cells.
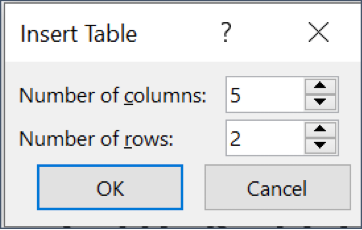
- Click on the Insert tab.
- Click on Table to open the Insert Table grid and drop-down menu.
- Select Insert Table.
- Click inside the Number of columns box and type number of columns.
- Do the same for the Number of rows.
- Click OK.
Note: Do not nest a table within another table or merged and split cells, because the screen reader will lose count and cannot provide information about the table.
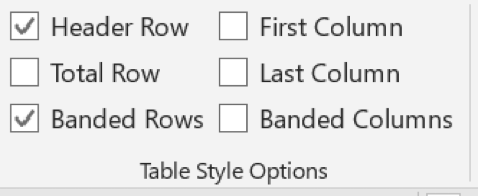
Add a Header Row
Click anywhere in the table.
- Click on the Table Design tab.
- In the Tables style Options group, select the Header Row checkbox.
- If the first column of the table contains headers for each row, select the checkbox for First Column.
- Enter the column and row headings if you have not done so.
Add Alt text to a table
- Right-click on the table.
- From the menu, select Edit Alt Text.
- Type a description in the box.
- If the object is for decoration, place a tick next to Mark as decorative.
- Click on the X top right to close the pane.
Use the link feature to paste a hyperlink in your presentation. Some screen readers give users the option of opening a list of all links in a presentation. Make the link text descriptive and keep it short.
ScreenTips appears when your cursor hovers over text or images that include a hyperlink.
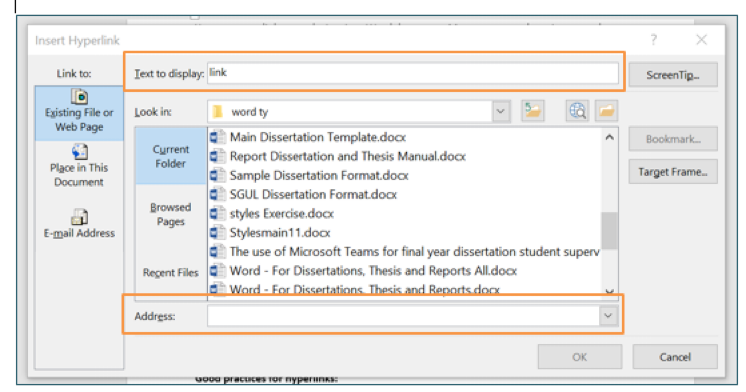
Insert and create a hyperlink
- Copy the URL (web page address) from your browser.
- Open the presentation.
- Select a word(s) or the sentence you want to apply the link to.
Right-click with the text selected and select Link from the menu.

The Insert Hyperlink dialog box
- In the Text to display box, the text you selected for the link will be shown.
- At the bottom of the dialog box, in the Address box, paste the URL from your browser.
- Click OK.
Add ScreenTip
- Select ScreenTip button top right of the hyperlink window.
- In the ScreenTip text box, type a ScreenTip.
- Click OK and OK again.
If you make changes to the design by removing, adding, or rearranging objects (text boxes, tables, charts, images) or you start with a blank slide, you will need to alter the reading order, even if the objects are logically arranged.
All objects on a slide are listed in the selection pane and has the name of the object which, can be renamed. The reading order starts from the bottom of the pane and can be changed by using the arrows. Selecting an object in the pane will also highlight it on the slide.
Open the Selection Pane
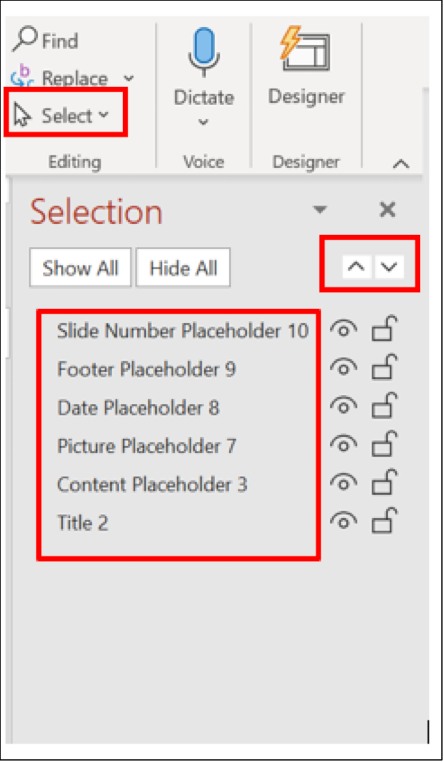
- Click on the Home tab.
- In the Editing group, click on Select.
- Select Selection Pane.
- Rearrange the order of the objects, by clicking on the object name and use the arrows to move it up or down.
Rename an object
- Double click on the object name.
- Type a name for the object.
- Press Enter on the keyboard.
Re-positioning objects
- Select the object.
- Click and hold down the mouse button and drag the shape in position.
Or use arrows keys on the keyboard.
Align Objects
- Select the object.
- Click on the Picture Format or Shape Format tab.
- In the Arrange group, click on Align and select an alignment from the list.
Align Objects with Smart Guides
- Drag the first object into position.
- Drag the next object until the smart guides appear showing the two objects aligned.
Using slide place holders is crucial for accessibility in presentations and when saving to a PDF format. Screen readers and other assistive technology use PowerPoint placeholders to read and navigate through slides, giving readers an idea of the slide structure.
Slide placeholder are pre-formatted containers that is used to display content, such as text, tables, graphics, videos, sound, charts, SmartArt and more and can be moved, resized, or edited.
PowerPoint built-in slide layouts include several types of content placeholders. You can use the default placeholders or modify the slide layouts using the Slide Master tool.