Formatting your document
View all Close all
Heading structure in documents is crucial for accessibility in Word documents and when saving to a PDF format. Screen readers and other assistive technology use Word's built-in Headings styles to navigate through documents and give readers an idea of the document structure. Screen readers give the flow of your page.
Applying styles ensures a consistent look throughout your document and saves time in document formatting. A built-in style can be applied to text in one click. The benefits are:
- All related text is formatted in the same way.
- Changing the appearance of a built-in style will change throughout the document.
- Using the hierarchy of headings, for example Heading 1, Heading 2, Heading 3 etc will enable screen readers to recognise headings for the listener, and create an automatic contents page which can be used to navigate through the document quickly using its headings.
Applying Styles
- Click in the paragraph or select the text.
- Click on the Home tab.
- In the Styles section, click on a Heading style to apply the style.

Apply Heading 1 to main headings, Heading 2 to subheadings, and Heading 3 to sub subheadings and so on. Ensure headings styles are applied in a hierarchical order, for example Heading 1, then Heading 2, then Heading 3 etc. Do not skip heading levels, for example Heading 2 to Heading 4.
Changing a style
Headings have predefined styles. To change a predefined style:
- Highlight a heading and change the font, size and colour.
- Right-click on the style name in the Style group on the Home tab, choose Update style name to Match Selection.
Or you can right-click on the selected text and choose Styles from the shortcut menu. Then select Update style name to Match Selection from the sidebar menu.
Select All Headings with the same Style
- Right-click on the style in the Styles group and click on Select All.
- Format as desired.
- Right-click on the style name in Styles window, select Update style name to Match Selection
Objects can help readers with dyslexia and learning difficulties understand meaning of the text.
Images placed randomly can interrupt the flow of the text and make it harder to follow. For accessible documents, place images at the beginning or end of paragraphs. They should be Inline or Floating. Avoid text wrapping images where a picture can be positioned anywhere on the page and text is wrapped around the image.
Positioning images
To improve the accessibility of inserted images, change them to In Line with Text.
- Select the image
- On the Format tab, choose the Position drop-down list.
- Select the first option, In line with Text.

An In line with Text picture is one that is embedded into the text itself, you can control the placement of the image by using text alignment features.
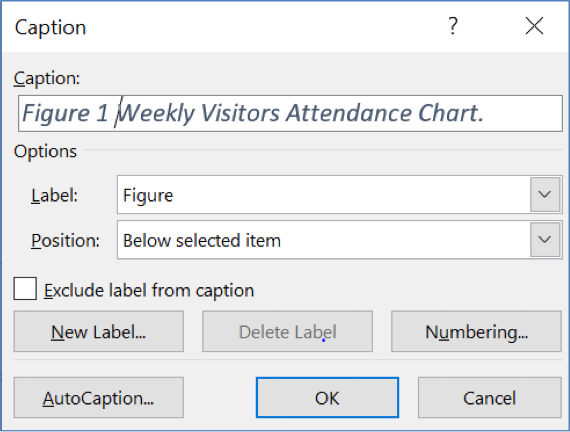
Add a Caption (label) to an Object
To add a caption to an object, for an example, an image:
- Select the picture, click on the References tab and click on Insert Caption.
- Type the text for the caption.
- Choose the Label and Position then click on OK.
To add Alt text (Alternative) to an object
Objects should have a description that explains the object or the content of that object.
- Click on an object to select it.
- On the Picture Tools or Graphic Tools tab, click Format.
- Click on Alt Text button.
- The Alt Text pane appears.
In the Description box, type a brief description of the alternative text in the Alt Text window. For more information, view: Everything you need to know to write effective alt text
Some screen readers give users the option of opening a list of all links in a document. When creating a link, ensure the text is descriptive as this is helpful for individuals and they will know where the link will take them.
Create Hyperlink
- Copy the URL from your browser.
- Open the document.
- Select the word(s) you want to apply the link to. Ensure the text is descriptive.
- Right-click selected text and select Link from the menu.
In the Insert Hyperlink dialog box:
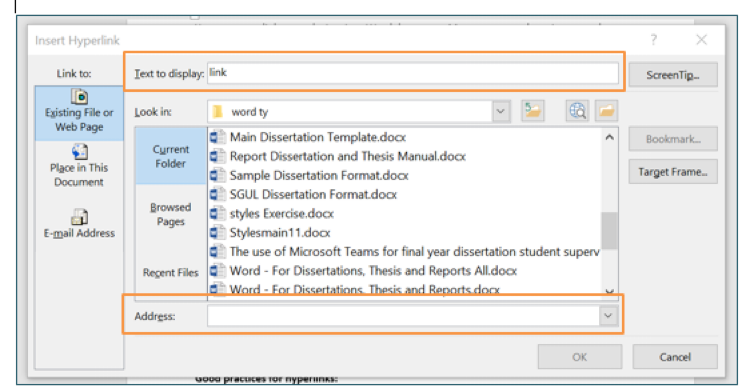
In the Text to display box, the text you selected for the link will be shown.
At the bottom of the dialog box, in the Address box, paste the URL from your browser.
Click OK.
Add ScreenTip
ScreenTips appear when your cursor hovers over text or images that have a hyperlink.
- Select ScreenTip button top right of the hyperlink window.
- In the ScreenTip text box, type a ScreenTip.
- Click OK and OK again.
Bullets can make text easier to read and help differentiate between the different points you want to make. Some screen readers will say that there is a list and then read the items. Lists can be used instead of a table when giving detailed information.
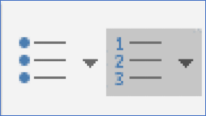
Start a bulleted or numbered list
- Click on the bullets or numbering button on the Home tab, then start typing.
- Press enter to add a new bullet or number.
- Press enter twice when you have finished the list.
Add bulleted or numbers to typed text
Select the text, then click the Bullets or Numbering button and they will be applied.
Change the number that the list starts
- Select the numbered list.
- Click the down arrow to the right of the numbered list button, then select Set Numbering Value.
- In the Set Numbering Value dialog box, change the Set Value To, to be the starting number of the list.
- Click OK.
To make tables more accessible to screen readers, apply the header row option. You can repeat the header row for long tables - this is useful if your table splits across pages as it will repeat the column headings on every page.
All tables should include alt text as well as column headings.
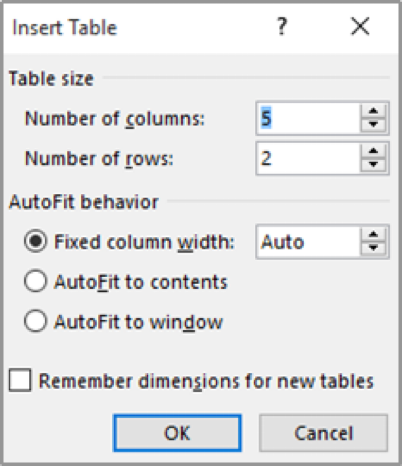
Insert table
- Click on the Insert tab.
- Click on Table to open the Insert Table grid and drop-down menu.
- Select Insert Table.
- Type in the Number of columns.
- Move to Number of rows and type number of rows.
- Click OK.
Add a header row
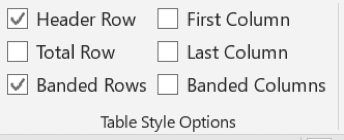
- Click anywhere in the table.
- On Table Tools tab, select Design and place a tick next to Header Row.
- Type the column headings.
Repeat Header Row
- Select the first row that holds the column headings.
- On the Table Tools tab, click Layout.
- In the Data section, click on Repeat Header Rows button.
Add alt text
- Right-click on the table.
- From the menu, select Edit Alt Text.
- Type a description in the box to add a (label) Caption or check Mark as decorative.
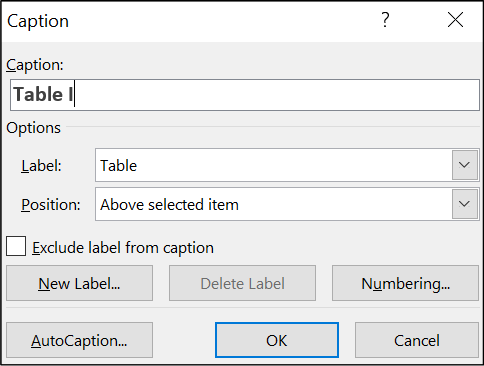
Insert Caption
- Click on the table, then click on the References tab.
- Click on Insert Caption in the Captions group.
- Type the text for the caption.
- Choose the Label and Position.
- Click OK.
Line Spacing
Line spacing sets the distance between each line of text. Line spacing can improve the readability of text.
- Highlight the paragraph.
- On the Home tab, click Line and Paragraph Spacing in the Paragraph group.
- Select the line spacing of your choice.

Paragraph spacing
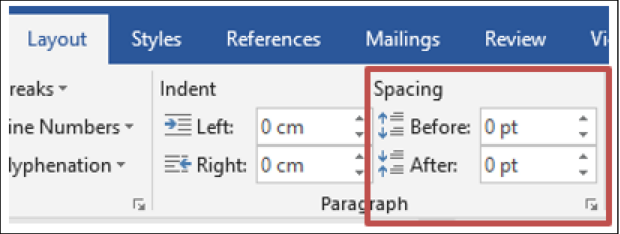
Paragraph spacing is the distance between paragraphs. Adequate spacing between paragraphs makes them easier to recognise. Paragraph spacing and line spacing should be set using Spacing Before and Spacing After rather than pressing the enter key to create space, which will be picked up by the Accessible Checker.
You will need to increase the paragraph spacing when you insert images or tables in your document. Use the Before to increase or decrease spacing above the image/table or After to increase or decrease spacing below.
- Click in the paragraph.
- Click on the Layout tab.
- Change the setting for Spacing Before or Spacing After in the Paragraph group.
To add a table of contents:
- Position the cursor on a blank page.
- Click on the References tab.
- Click on Table of Contents in the Table of Contents group.
- Click on Automatic Table 1 or Automatic Table 2 layouts.
Update the contents page
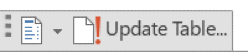
Click on the table of contents page
- Click on Update Table
- Click on Update entire table then click on OK.
Or
- Click on the table of contents page.
- Right click, select Update Field.
- Select Update entire table then click on OK.
Section breaks allows you to separate pages in a document, by applying different formatting and layouts to different page. For example, applying a next Page Section Break in a document enables one section to have portrait orientation and the other to have landscape orientation.
Insert a Next Page Section Break
The Next Page section break will start a new section on the next page. You use this section break when you want to apply an affect many pages. For example, if you want to: create different headers and footers for different pages, chapters or, if you want to change the page orientation.
- Place the cursor where you want to insert the page break.
- Click on the Layout tab.
- Select Breaks, click Next Page.
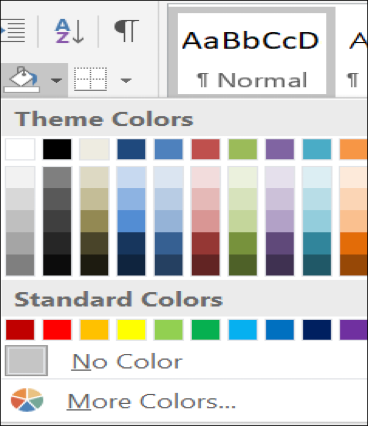
As well as using Styles to organise your document, you can also create paragraph banners. A paragraph banner extends across the width of the page and highlights the text within the banner and updates when you use a different document theme. This is a suitable alternative to tables.
- Select the text you want to apply shading to.
- On the Home tab, in the Paragraph group, click the arrow next to Shading.
- Under Theme Colours, select the colour that you want.
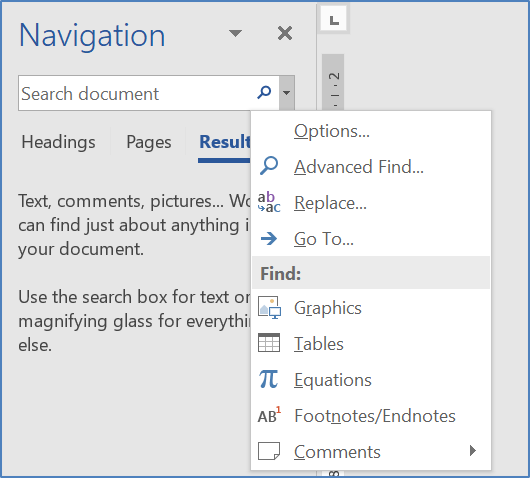
The Navigation pane is a handy feature that allows you to quickly navigate around your document when you use the built-in heading styles. This will give you an idea on how others view your document structure. You can also use the Navigation pane to:
- Navigate to a section quickly
- View a list of all the headings
- Re-arrange sections
- View layout of pages
- Search and view graphics and tables
Open the Navigation Pane
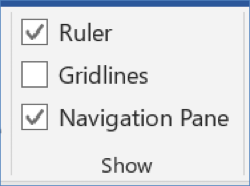
- Click on the View tab.
- Then click on Navigation Pane in the Show group. The pane will appear on the left of the screen.
Browse by thumbnails
- Click the Pages tab near the top of the Navigation pane.
- Click on a page in the Navigation pane to view it.
Browse by headings
- Click on the tab near the top of the Navigation pane.
- Click on a heading to view the page.
Browse by objects
- Click on the dropdown list near the top of the Navigation pane.
- Click on a Graphics or Tables if you want to view those objects.